Add an Attachment to a Dynamics CRM Entity
To add an attachment to an entity for Dynamics CRM, do the procedure in this topic.
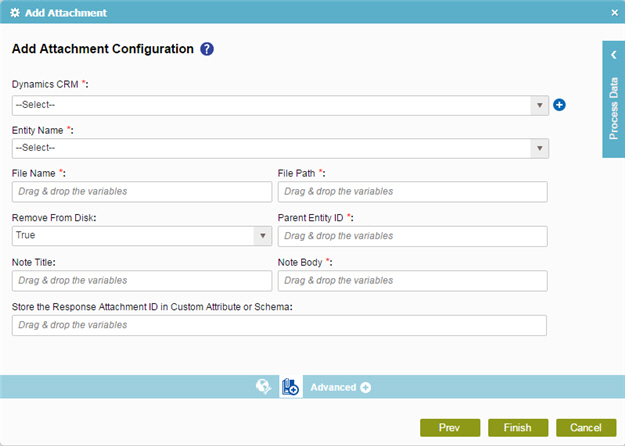
Add Attachment Configuration Screen
Prerequisites
- Create an access token for your Dynamics CRM application.
Good to Know
- In most text fields, you can use process data variables as an alternative to literal data values.
How to Start
- On the Organizer, do one of these:
- Do one of these:
- Add an activity:
- In the Process Builder, in the Activity Library,
open the Dynamics CRM
 tab.
tab. - On the Dynamics CRM
tab,
drag the Add Attachment (Dynamics CRM)
 activity onto your process.
- In the Process Builder, in the Activity Library,
open the Dynamics CRM
- Change an activity:
- In your process, double-click your activity.
- Add an activity:
- On the Add Attachment Configuration screen, click Add Attachment
 .
.
Procedure
- On the Add Attachment Configuration screen, in the Dynamics CRM field, select your Dynamics CRM access token.
To create a new access token, click Add Token
 . For more information, refer to
New Dynamics CRM Access Token.
. For more information, refer to
New Dynamics CRM Access Token. - In the Entity Name field, select your entity name.
- Complete these fields as necessary.
- (Optional) To store the attachment ID as a
process data variable, add the variable from the Process Variables screen to the
field Store the Response Attachment ID in Custom Attribute or Schema.
Field Name Definition Store the Response Attachment ID in Custom Attribute or Schema
- Function:
- Specifies the process data variable that contains your attachment ID.
- Accepted Values:
- A process data variable.
- Default Value:
- None
- Accepts Process Data Variables:
- Yes
